Virtualising OPNsense on Proxmox as your Router
I recently bought a mini PC from AliExpress to expand my Proxmox server with an additional node. It seemed like the perfect chance to also set up a home firewall — partly for fun, but mainly to learn how to properly segment my network and block unwanted traffic from my IoT devices.
In this post, I'll walk through setting up OPNsense as my firewall. For now, I'll be running it as a secondary router for testing purposes, and once everything is configured correctly, I'll switch it over to become the primary.
Why Run OPNsense as a VM?
Easier Maintenance with Minimal Downtime
You can snapshot the VM before upgrades or configuration changes, allowing quick rollbacks and minimal network downtime.
VLAN Management and Network Segmentation
Segment your home network into zones (e.g., IoT, servers, personal devices) for better security and easier management.
Performance and Resource Efficiency
Instead of a dedicated box, allocate only the CPU, RAM, and disk space that OPNsense needs. Scale resources up or down easily.
High Availability and Migration
Running Proxmox across multiple nodes allows live-migration of your OPNsense VM, improving reliability and uptime.
Pros and Cons:
| Pros | Cons |
|---|---|
| ✅ Easy snapshots & rollbacks for upgrades or config changes | ❌ Single point of failure if the Proxmox host or VM crashes |
| ✅ Scalability via live-migration across Proxmox nodes | ❌ Requires NIC passthrough (IOMMU/VT-d) for best performance |
| ✅ Built-in High Availability support | ❌ More complex network setup (bridges, VLANs, routing) |
| ✅ Fine-grained resource allocation (CPU, RAM, storage) |
Network Layout Design
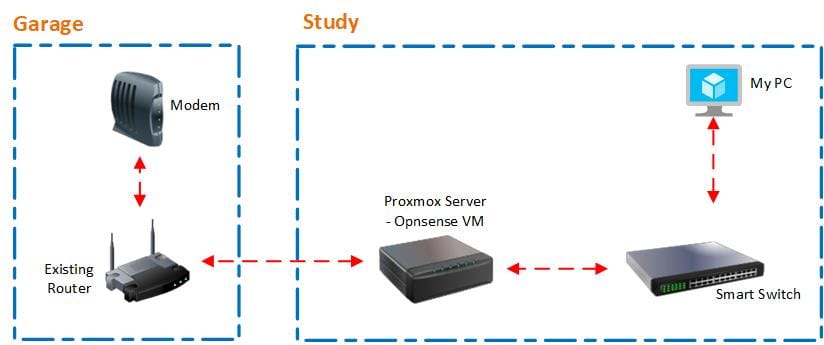
Here’s the network design I’m currently working towards. I’m introducing a second router into the setup — initially as a secondary pathway for testing, and eventually it’ll take over as the main router once everything is properly configured.
- Current Router IP Range:
192.168.0.1/24 - New Router (OPNsense) IP Range:
192.168.1.1/24
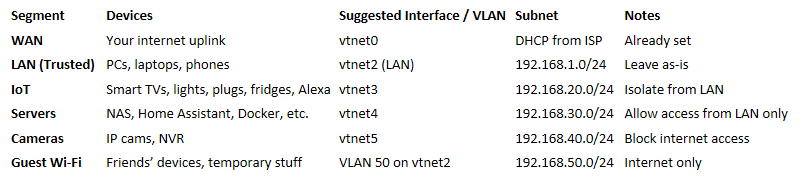
Future Network Segmentation Plan
This is something I aim to achieve eventually, but I'm leaving it here in case I decide to create a separate guide for it.
Network Switch
Now, I've added a network switch to the mix but this is optional. Ensure that the switch IP is different from the one I'm using below. I'm using a TP Link SG10116E

Requirements
- A physical PC or mini PC: For this guide, I’m using a Topton mini PC purchased from Aliexpress.
- Proxmox 8.4.0: This version will be used for the setup in this guide.
- A test machine: I'll be using my personal PC as the test machine.
Physical Connections
For this guide, we’ll use just two of the Topton mini PC’s NICs—enp1s0 and enp3s0—each mapped to its own Proxmox bridge and clearly labeled in the table below. The interface enp2s0 will remain unused.
| NIC | Bridge | OPNsense | MAC Address | Connects To | Purpose |
|---|---|---|---|---|---|
| enp1s0 | vmbr0 | vtnet0 | (blank) | TP-Link LAN (existing) | Proxmox management and WAN |
| enp3s0 | vmbr2 | vtnet2 | (blank) | TP-Link LAN (2nd port) | LAN |
Let's jump right into it!
Download and install Proxmox
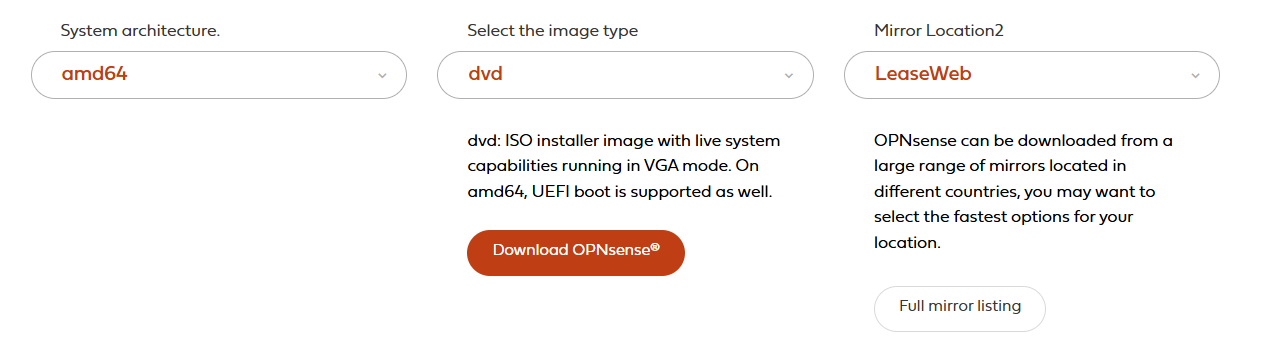
- Download and install the ISO to your proxmox server https://opnsense.org/download/. You'll need to extract it as it comes compressed as a .bz2 file.
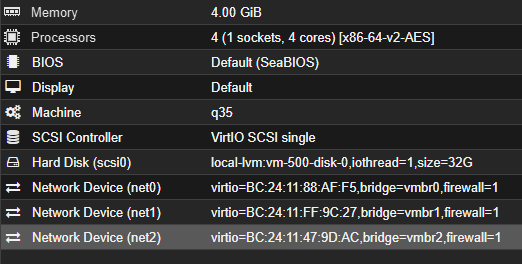
- Mount it to your VM and follow the prompts. This is the hardware I've assigned it with. Note: I'll be adding the additional devices(NICS) in the steps below
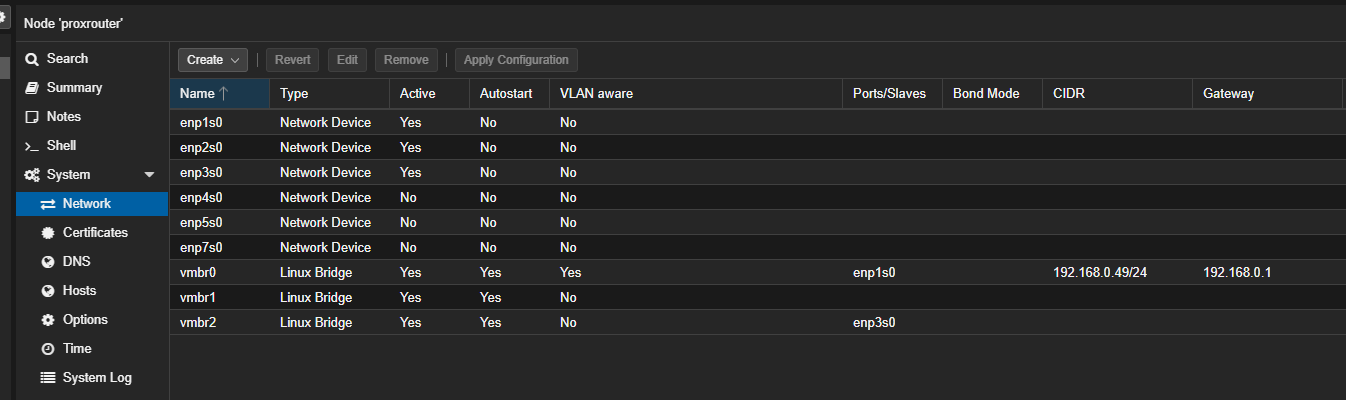
- Next, we’ll create two new bridges on Proxmox while keeping your existing router in place:
Open a shell on your Proxmox host (either via the web GUI or SSH) and run:
nano /etc/network/interfaces
Update the configuration as shown in the next section.
Explained:
- Loopback (lo):This is just a system-related network interface for internal communication, and it’s unchanged.
- Main Bridge (vmbr0):This is your connection to the internet or router. It’s given an IP address (
192.168.0.49), and the traffic goes out through your router (192.168.0.1).It uses theenp1s0network port - WAN Bridge (vmbr1):This is for the OPNsense firewall. It’s set up to connect to the WAN (internet) but has no IP address directly on the Proxmox host. It’s only used by OPNsense.
- LAN Bridge (vmbr2):This bridge is for OPNsense's LAN side. It uses the
enp2s0network port, which will be used to manage local network traffic.
# Existing config (keep this)
auto lo
iface lo inet loopback

#iface enp1s0 inet manual

#Management + OPNsense WAN
# Main bridge (VLAN-aware, connected to router/ISP)
auto vmbr0
iface vmbr0 inet static
    address 192.168.0.49/24
    gateway 192.168.0.1
    bridge-ports enp1s0
    bridge-vlan-aware yes
    bridge-vids 10
    bridge-pvid 1
    bridge-stp off
    bridge-fd 0
# WAN Bridge (for OPNsense WAN)
auto vmbr1
iface vmbr1 inet manual
        bridge-ports none
        bridge-stp off
        bridge-fd 0

# LAN Bridge (for OPNsense LAN)
auto vmbr2
iface vmbr2 inet manual
        bridge-ports enp2s0
        bridge-stp off
        bridge-fd 0

# Other NICs (optional, for future use)
iface enp4s0 inet manual
iface enp5s0 inet manual
iface enp7s0 inet manual

source /etc/network/interfaces.d/*
Save and exit:
- Press
Ctrl + Oto write your changes. - Press
Enterto confirm. - Press
Ctrl + Xto quit the editor.
OpenSense VM setup
Before diving into the GUI, you’ll need to assign the correct virtual NICs and set up the IP addressing for each interface.
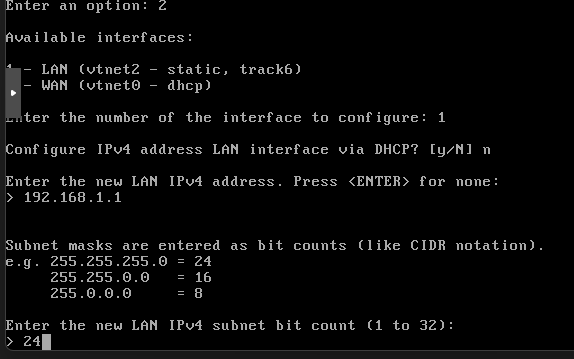
- Set interface IP Address. You'll only want to set the IP address for the LAN. WAN should automatically get an IP from the existing DHCP server on the existing router

LAN Interface Address
You'll be asked to set the IP Address, Range, Subnet Mask, and Gateway. I've chosen to skip setting up IPv6 for simplicity
I'm using this:
IP Address: 192.168.1.1
Range: 192.168.1.100 - 192.168.1.199
Subnet Mask: /24

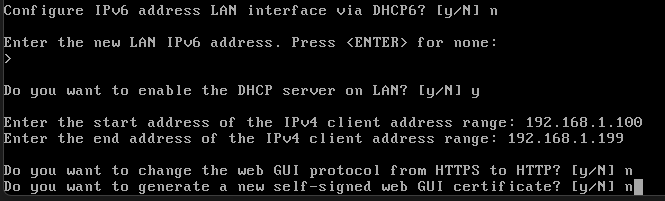
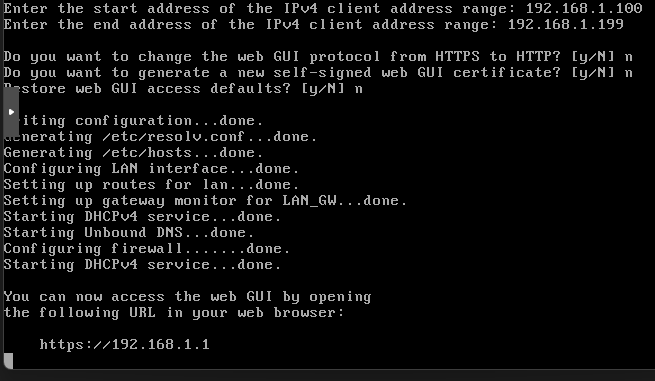
Once all prompts are completed, you'll be prompted with the below
WAN Interface Address
Follow the prompts as follows
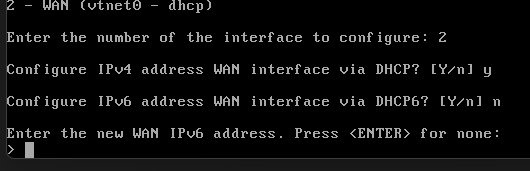
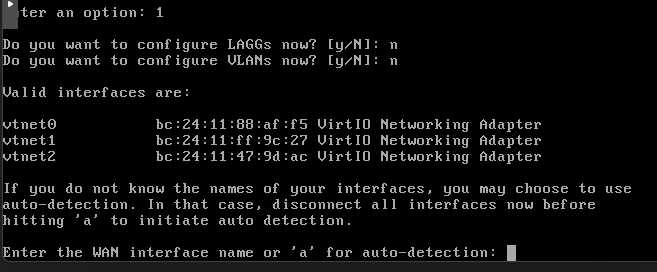
- Assign interfaces
- Enter the WAN interface name - in my case, I'm going to use the existing one vtnet0
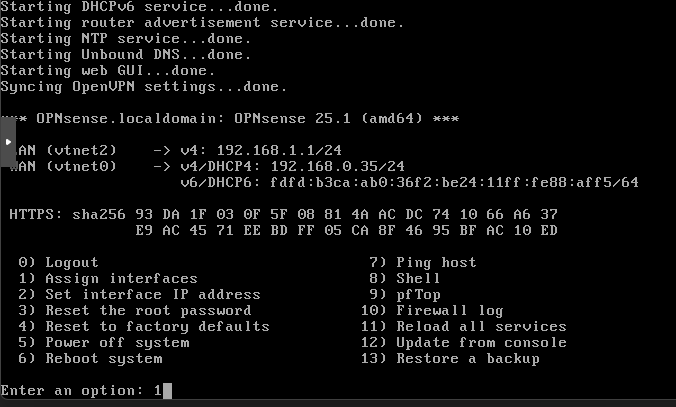
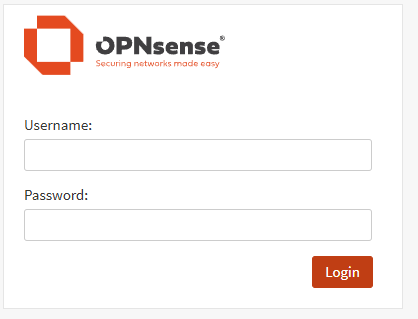
Navigate to the address to confirm you can access the GUI
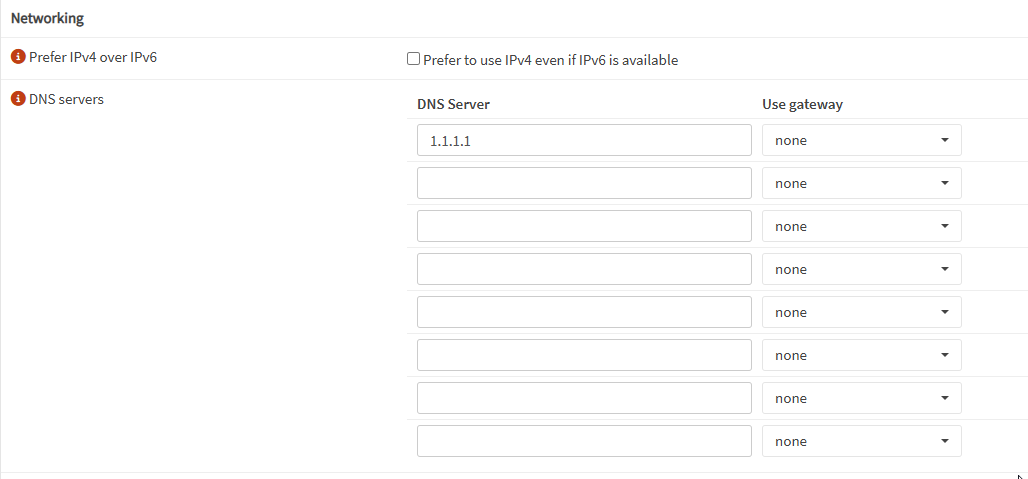
One thing you'll notice is that you cannot access the internet.

To try resolve this, please restart the VM via the gui or console or set up DNS Server to 1.1.1.1
And that's it for this guide. In the next part, I'll be adding VLANS to the mix. Stay tuned.
Found this article useful? Why not buy Phi a coffee to show your appreciation?