
How to Set Up Ntfy for Push Notifications Using Docker
In this post, I'll show you how to set up ntfy for notifications. I personally use it for Home Assistant notifications, but it can also be integrated into automation platforms through its HTTP API. It is entirely self-hosted and works well for home automation.
What is ntfy?
ntfy (pronounced notify) is an open-source, HTTP-based pub‑sub notification service you can self-host. You can send push notifications to your phone, desktop, or web apps using simple scripts.
Why Use It?
- Self-hosted - full control over your data and uptime
- Lightweight: works well on Raspberry Pi or low-resource VMs
- Supports Android, iOS, desktop, and web clients
- Offers attachments, priority levels, titles, tags, and authentication
Prerequisites
- Docker Installed
- Domain (Optional) if you want to expose it to the public internet
Let's begin
Create Docker Compose file
First, you want to install ntfy using Docker. Copy and create the file below. Change parameters to your specific needs
docker-compose.yml
networks:
  ntfy_network:
    driver: bridge
    name: ntfy_network

services:
  ntfy:
    image: binwiederhier/ntfy:latest
    user: 1000:1000                # Use a non-root user (replace with correct UID:GID)
    container_name: ntfy
    restart: unless-stopped

    networks:
      - ntfy_network

    ports:
      - "5050:80"  # Restrict to localhost for reverse proxy use

    volumes:
      - ./ntfy_data:/etc/ntfy:ro  # Make config read-only
      - ./ntfy_cache:/var/cache/ntfy

    command:
      - serve
      - --config
      - /etc/ntfy/server.yml

    environment:
      - TZ=UTC
      - TZ=Australia/Melbourne
      - NTFY_BASE_URL=http://localhost:5050
      - NTFY_UPSTREAM_BASE_URL=https://ntfy.sh
      - NTFY_AUTH_DEFAULT_ACCESS=deny-all
      - NTFY_BEHIND_PROXY=true
      - NTFY_WEB = false
    read_only: true  # Extra layer of protection
    tmpfs:
      - /tmp  # Secure temporary storage

    security_opt:
      - no-new-privileges:true

    logging:
      driver: "json-file"
      options:
        max-size: "1m"
        max-file: "3"
Create the directory and an empty server.yml file
You'll need to create this directory and file for the config
mkdir -p ntfy_data && touch ntfy_data/server.yml
Grant permissions
Next is granting permissions. Use the below commmands. This is needed to grant permission to user 1000 thats defined in the docker file
sudo chown -R 1000:1000 ntfy_data
sudo chown -R 1000:1000 ntfy_cache
Edit the server config
Copy and paste the below contents into the server.yml file. These are my settings below. For best practices, check the offficial documentation https://docs.ntfy.sh/config/
base-url: "http://localhost:5050"

# Remove unless you're proxying notifications via ntfy.sh (not needed with your own server)
upstream-base-url: "https://ntfy.sh"

# Enable behind-proxy mode for correct handling of Cloudflare headers
behind-proxy: true

# Enable rate limiting to mitigate abuse
rate-limit-burst: 5
rate-limit-every: 10s

# Cache settings
cache-file: /var/cache/ntfy/cache.db
cache-duration: "24h"
cache-startup-queries:
  pragma journal_mode = WAL;
  pragma synchronous = normal;
  pragma temp_store = memory;
  pragma busy_timeout = 15000;
  vacuum;

# Auth settings
auth-file: /var/cache/ntfy/auth.db
auth-default-access: "deny-all"  # Strict access by default
auth-startup-queries:
  pragma journal_mode = WAL;
  pragma synchronous = normal;
  pragma temp_store = memory;
  pragma busy_timeout = 15000;
  vacuum;

# Attachment settings
attachment-cache-dir: "/var/cache/ntfy/attachments"
attachment-total-size-limit: "1G"
attachment-file-size-limit: "10M"
attachment-expiry-duration: "2h"

# Global and visitor limits (tighten to avoid abuse)
global-topic-limit: 50
visitor-subscription-limit: 5
visitor-attachment-total-size-limit: "20M"
visitor-attachment-daily-bandwidth-limit: "50M"
Key takeaways
- Volumes:
- ./ntfy_data:/etc/ntfy:ro: Mounts config data as read-only.
- Environment Variables:
- NTFY_BASE_URL: Public base URL of your instance.
- NTFY_AUTH_DEFAULT_ACCESS=deny-all: Denies all access by default (overridden by config or auth).
- Temporary File Storage in tmpfs:
- Mounts /tmp in memory, reducing risk of malicious persistence or leaking sensitive files to disk.
- Auth Deny by Default:
- With NTFY_AUTH_DEFAULT_ACCESS=deny-all, no anonymous user can publish or subscribe unless explicitly allowed.
Run the container
Use docker compose up -d command
docker compose up -d

Navigate to the URL to confirm it's up
Navigate to http://localhost:5050/ - localhost being your IP

Grant Permissions
Now, since we've blocked all permissions as you can see below, you'll need to explicity define the users
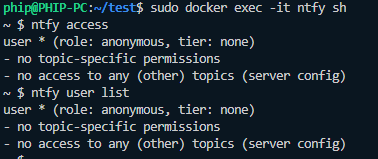
As an example, I'll create a admin user called alice just so I can log in the web UI and test.
Use sudo docker exec -it ntfy sh to login the docker container and enter the below command to create the user
ntfy user add --role=admin alice
Below are some useful commands for ntfy
NTFY Commands
| Action | Command |
|---|---|
| Create admin user | ntfy user add --role=admin alice |
| Create normal user | ntfy user add bob |
| List users | ntfy user list |
| Change role | ntfy user change-role bob admin |
| Reset password | ntfy user change-pass alice |
| Delete user | ntfy user remove bob |
| List all ACL entries | ntfy access |
| Show user ACLs | ntfy access alice |
| Set write-only on topic | ntfy access bob corridor wo |
| Set read-only on topic | ntfy access bob alerts ro |
| Set read/write on topic | ntfy access bob main rw |
| Deny topic access | ntfy access bob secret deny |
| List tokens for user | ntfy token list alice |
| Create new token (optionally expire) | ntfy token add alice --expire=30d |
| Delete a token | ntfy token remove alice abcd1234ef5678... |
| Delete all tokens for user | ntfy token remove-all alice |
Subscribe to a Topic and logic
Create a topic or generate a name and then click subscribe
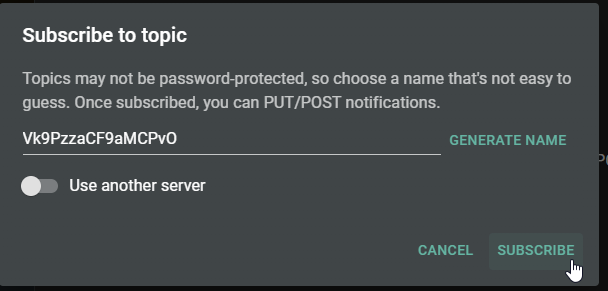
Use the credentials you created above
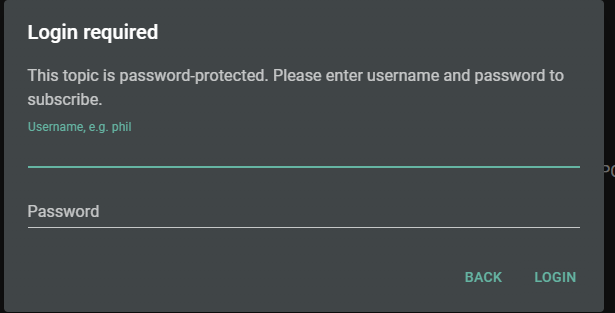
Send a Notification with curl
Open a terminal and try sending a message to your ntfy instance using curl. If authentication is required and no credentials are provided, the server will respond with a 403 Forbidden error.
curl -u *username*:*password* -d "Your message here" https://*ntfy-instance*/*topic*

Change the command with the below credentials and try again
curl -u alice:password123 -d "Test Message" http://localhost:5050/test
Navigate to the UI to check your message
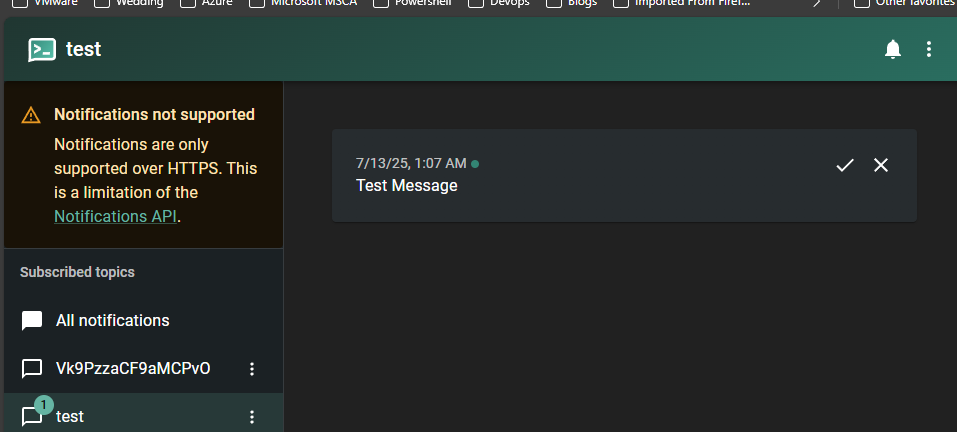
Great, you've succesfully configured your ntfy instance! This ntfy server config implments good security practice by blocking authentication for all requests and rate limiting.
That said, you can now make your ntfy instance accessible on the public internet. For secure and controlled access, I use a Cloudflare Tunnel to expose it without directly opening ports.
Found this article useful? Why not buy Phi a coffee to show your appreciation?